
Introduction to Helm Charts
28 Sep, 2020Helm is a package manager for Kubernetes. It helps to manage more complex applications that consist of multiple deployments, services, ingresses etc.
In this post we will create a simple .NET Core application and use Helm to deploy it.
Create simple “Hello World” application in .NET Core
Before proceeding You will need to install the following:
.NET Core 3.1 or higher available here
Docker available here
Helm 3.3.4 or higher available here
Let’s create a new directory for our project
PS> mkdir HelloWorld
PS> cd HelloWorld
and the project itself using dotnet CLI tool.
PS> dotnet new webapi --output HelloWorld.ApiLet’s add dev certificates.
PS> dotnet dev-certs https
PS> dotnet dev-certs https -t
If You have any issues with the certs, try to clean them using:
dotnet dev-certs https --cleanThen, try again to create and trust the certificate
Let’s add HelloController.cs to the HelloWorld/HelloWorld.Api/Controllers folder.
using System;
using Microsoft.AspNetCore.Mvc;

namespace HelloWorld.Api.Controllers
{
    [ApiController]
    [Route("[controller]")]
    public class HelloController : ControllerBase
    {
        [HttpGet]
        public string Get(string name)
        {
            return $"Hello, {name}";
        }
    }
}
To check our code, we can run it using
PS> dotnet runThen, we can simply go to https://localhost:5001/hello?name=John.
In response, we should see 200 OK with Hello, John body.
Adding Docker support
Firstly, we have to create a file named Dockerfile in the project directory (HelloWorld.Api) with the following content.
FROM mcr.microsoft.com/dotnet/core/sdk:3.1 AS build-env
WORKDIR /app

# Copy csproj and restore as distinct layers
COPY *.csproj ./
RUN dotnet restore

# Copy everything else and build
COPY . ./
RUN dotnet publish -c Release -o out

# Build runtime image
FROM mcr.microsoft.com/dotnet/core/aspnet:3.1
WORKDIR /app
COPY --from=build-env /app/out .
ENTRYPOINT ["dotnet", "HelloWorld.Api.dll"]
This dockerfile utilizes multi step build feature.
In the beginning, we define build-env image.
We copy our project files to it, and run commands to build the final image using dotnet CLI.
In second step, we create runtime image, and copy our release files from the previous image.
Then we specify ENTRYPOINT command, being dotnet aspnetapp.dll to run the application.
Since we are building our solution using Docker, we don’t want to copy files from /obj and /bin folders.
To exclude these, we have to create .dockerignore file in project directory with the folowing content:
bin/
obj/
We can test our application locally
PS> docker build -t helloworldapp:0.1 .
PS> docker run -d -p 8080:80 --name helloworldapp helloworldapp:0.1
After opening http://localhost:8080/hello?name=John in the browser we should see the same response as earlier.
Adjusting the application for Kubernets
Now we have to add HealthChecks - readiness and liveness probes, so that Kubernets will know when our application is up and running.
To do this, our Startup class should look like this
public class Startup
{
    public Startup(IConfiguration configuration)
    {
        Configuration = configuration;
    }
    public IConfiguration Configuration { get; }
    public void ConfigureServices(IServiceCollection services)
    {
        services.AddHealthChecks(); // Added HealthChecks
        services.AddControllers();
    }
    public void Configure(IApplicationBuilder app, IWebHostEnvironment env)
    {
        if (env.IsDevelopment())
        {
            app.UseDeveloperExceptionPage();
        }
        app.UseHttpsRedirection();
        app.UseRouting();
        app.UseAuthorization();
        app.UseEndpoints(endpoints =>
        {
            endpoints.MapHealthChecks("/"); // Added endpoint mapping to match thedefault
            endpoints.MapControllers();
        });
    }
}
After this adjustment, we can re-create our image with 0.1.1 tag, and try the health check.
http://localhost:8080 will return 200 OK with Healthy body.
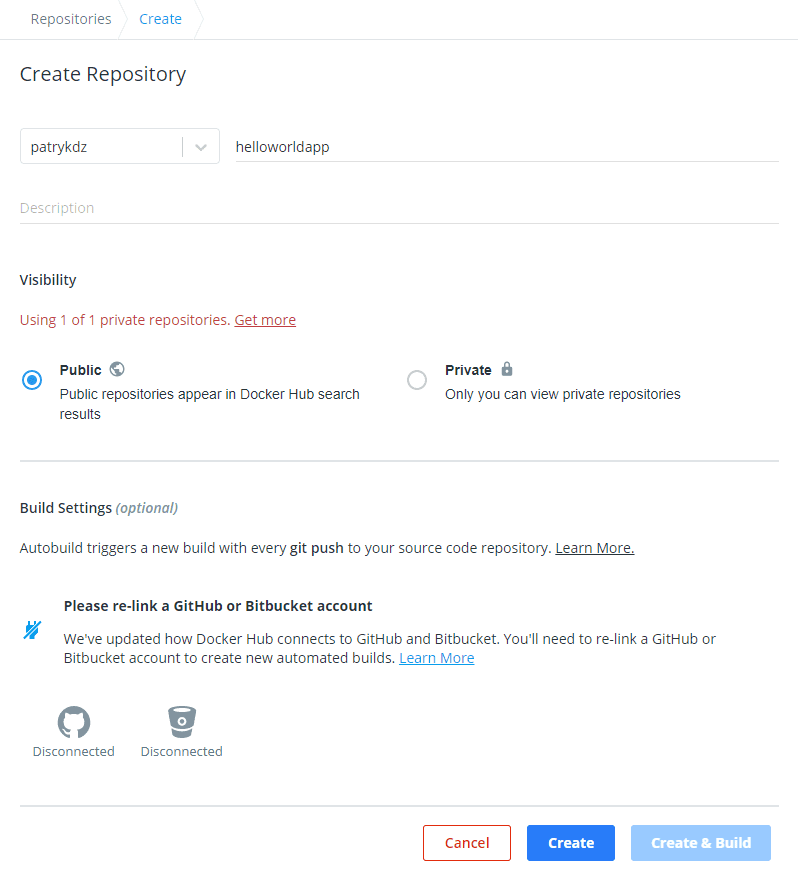
Publishing the container do DockerHub
We have to login to DockerHub here Then we have to create a repository

Now we have to login to Docker Hub from CLI to push our image
PS> docker login
Login with your Docker ID to push and pull images from Docker Hub. If you don't have a Docker ID, head over to https://hub.docker.com to create one.
Username: your_username
Password: your_password
Login Succeeded
Let’s “tag” our image, and then push it to our registry.
PS> docker tag helloworldapp:0.1 your_login/helloworldapp:0.1
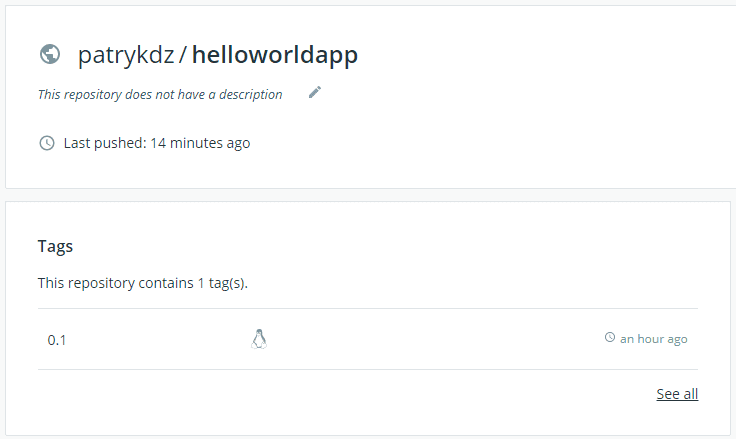
PS> docker push your_login/helloworldapp:0.1After the image is successfully pushed, we can double check it on Docker Hub
Configuring local Kubernets cluster
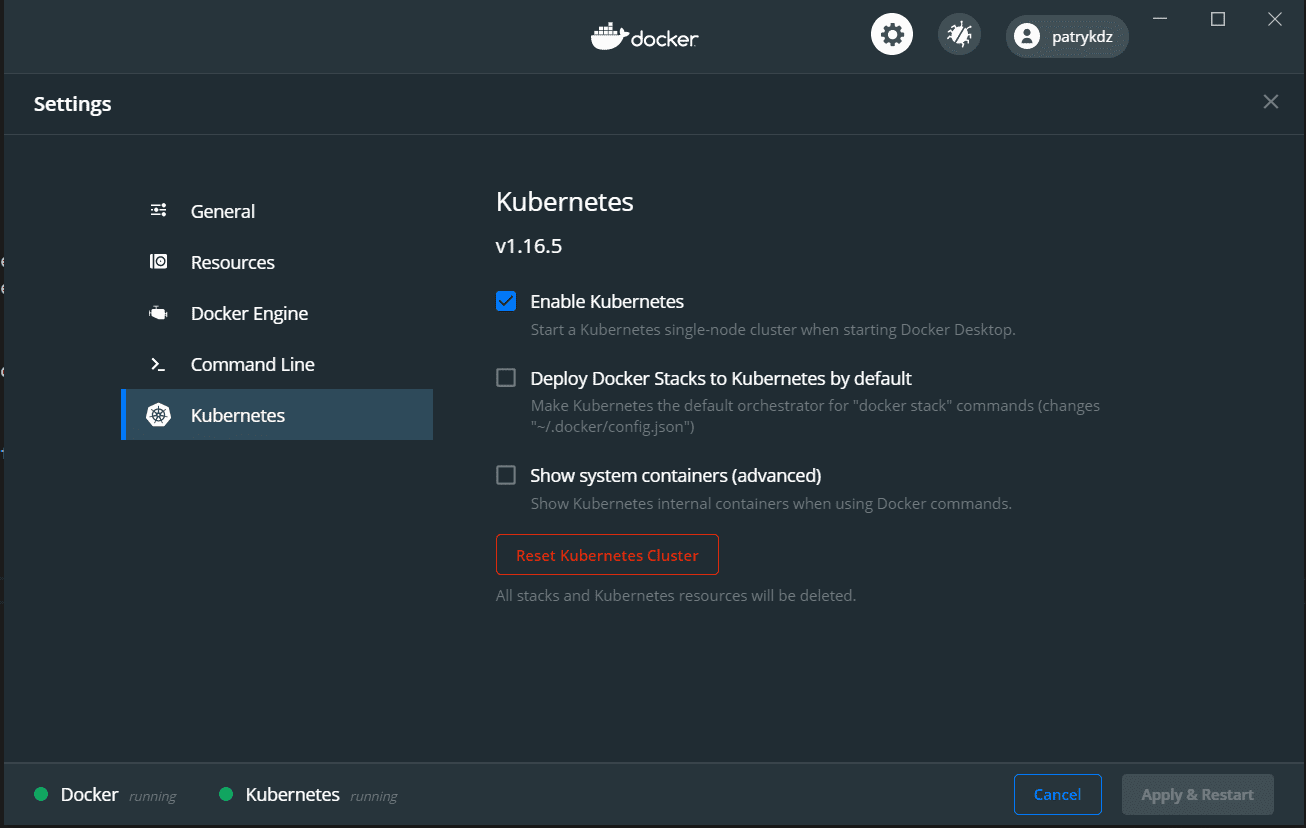
Before proceeding we need to enable local Kubernetes cluster.
We can do it from Docker Desktop settings by checking “Enable Kubernetes”, and clicking Apply & Restart
We can check if Docker Desktop correctly configured our kubectl context, by using:
PS> kubectl config current-config
docker-desktop
Create Helm chart for our application
Let’s add deploy folder in our HelloWorld solution directory (above HelloWorld.Api level).
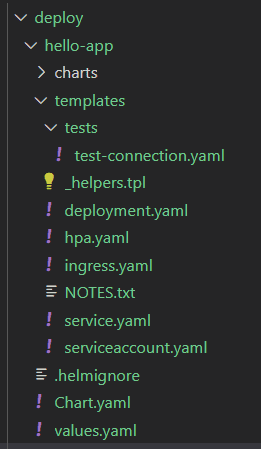
Then we can create new Helm Chart
PS> helm create hello-appAs a result, helm will create the following structure:
Let’s test our default chart
PS> cd deploy
PS> helm install hello-app ./hello-app --set service.type=NodePort
As a result we should get:
NAME: hello-app
LAST DEPLOYED: Mon Sep 28 14:46:44 2020
NAMESPACE: default
STATUS: deployed
REVISION: 1
NOTES:
1. Get the application URL by running these commands:
  export NODE_PORT=$(kubectl get --namespace default -o jsonpath="{.spec.ports[0].nodePort}" services hello-app)
  export NODE_IP=$(kubectl get nodes --namespace default -o jsonpath="{.items[0].status.addresses[0].address}")
  echo http://$NODE_IP:$NODE_PORT
Let’s check our deployment
PS> kubectl get deploymentAfter some time the deployment will be finished, indicated by 1/1 in the READY column.
NAME        READY   UP-TO-DATE   AVAILABLE   AGE
hello-app   1/1     1            1           68s
The default chart deployed an nginx image. To access it, we have to figure out its running.
PS> kubectl get svcThis lists all services in the current default namespace
NAME         TYPE        CLUSTER-IP      EXTERNAL-IP   PORT(S)        AGE
hello-app    NodePort    10.109.54.182   <none>        80:31279/TCP   6m46s
kubernetes   ClusterIP   10.96.0.1       <none>        443/TCP        150m
On port 31279 we can see working nginx

Adjust Helm Chart to run our application
To run our application, we need to adjust values.yaml file.
At the beginning of the file, we have to adjust image seciton of the file like this:
image:
  repository: your_account/helloworldapp
  pullPolicy: IfNotPresent
  # Overrides the image tag whose default is the chart appVersion.
  tag: "0.1.1"
This tells Helm to use our image with 0.1.1 tag, that we have already pushed to our Docker Hub registry.
Lets check our currently running deployment
PS> helm list
NAME            NAMESPACE       REVISION        UPDATED                                 STATUS          CHART           APP VERSION
hello-app       default         1               2020-09-28 14:46:44.9830634 +0200 CEST  deployed        hello-app-0.1.1 1.16.0
Since we have already deployed our chart (running nginx now), we can upgrade our deployment instead of installing it again
PS> helm upgrade hello-app ./hello-app --set service.type=NodePort
Release "hello-app" has been upgraded. Happy Helming!
NAME: hello-app
LAST DEPLOYED: Mon Sep 28 16:02:01 2020
NAMESPACE: default
STATUS: deployed
REVISION: 2
Let’s see our deployment
PS> helm list
NAME            NAMESPACE       REVISION        UPDATED                                 STATUS          CHART           APP VERSION
hello-app       default         3               2020-09-28 22:56:32.2392812 +0200 CEST  deployed        hello-app-0.1.0 1.16.0
For local deployment, we have set service type to NodePort. Because of that, we can connect to our service on assigned port.
PS> kubectl get svc
NAME         TYPE        CLUSTER-IP      EXTERNAL-IP   PORT(S)        AGE
hello-app    NodePort    10.109.51.173   <none>        80:32572/TCP   4m6s
kubernetes   ClusterIP   10.96.0.1       <none>        443/TCP        10h
Our service is running on port 32572. Lets test it again.
PS> curl.exe -i localhost:32572/hello?name=John
HTTP/1.1 200 OK
Date: Mon, 28 Sep 2020 21:08:47 GMT
Content-Type: text/plain; charset=utf-8
Server: Kestrel
Transfer-Encoding: chunked

Hello, John
Conclusion
Today, we created a very simple app, published a docker image for it, and deployed it to local kubernetes cluster using Helm.
In next articles we will take an in depth look on how container orchestration works.
